- de
- en
This is an old revision of the document!
Table of Contents
Images in the Questionnaire
There are a number of reasons to use images in the questionnaire: as the stimulus in the survey, the university or company logo on each page, a logo, or the scanned signature welcoming the participant to the questionnaire.
This chapter explains how to optimize images for online display, and how to subsequently insert them into the questionnaire. First of all, a word of warning in advance.
Copyright and Costly Cease-And-Desist Orders
As a rule, photos, as well as graphics (e.g. section of a map) are subject to copyright. If there are people in the picture, then this is also subject to privacy rights.
If you use an image taken from the internet or the image of a person, you face – alongside claims for damages – horrendous lawyers' fees. For more information, please look up the term “cease-and-desist” on the internet.
Therefore, you always need written consent from the author to use the image (right of use). Furthermore, written consent is required from the people in the picture. Free image databases are an exception to this rule – however, some other restrictions may apply (e.g. that the author has to be specified).
Outline
Images are stored on the internet as standalone files that can be downloaded from a web address (URL). There are two stages to using images in the questionnaire:
- First of all, the image must be made available as a standalone image file on the internet. The graphic then has to be uploaded in Image and Media Files in the project overview.
- Afterwards, the image has to be embedded into the questionnaire. There are several ways of doing so - depending on the intended use.
- The image appears in Compose Questionnaire on the bottom right. You can simply drag & drop the image into the questionnaire here.
- If you click on the image in Image and Media Files, the file name will be shown as well as an HTML code to embed the image. This HTML code can be used in text elements, questions, items etc.
If an image is embedded using HTML code, the position of the image can be adjusted more precisely. The HTML code displays the image image.jpg in the center and leaves a spacing of 40 pixels above/below for other content.
<div style="text-align: center; margin: 40px 0">
  <img src="image.jpg" alt="Image of a Woman">
</div>
The following HTML code displays an image aligned to the right and enables text to flow to the left of it with a spacing of 20 pixels. This could be used, for example, for the question title.
<img src="image.jpg" alt="Image of a Woman" style="float: right; margin-left: 10px">
Please look closely at the image on the right.
Afterwards, please evaluate the image in light of the statements that can be read below.
You can also fall back on the predefined CSS classes “left” and “right” for floating text.
<img src="image.jpg" alt="Image of a Woman" class="right">
Please look closely at the image on the right.
Note: Theoretically, you could also use images that stored on a different web server in the questionnaire with HTML code . However, the legal problems regarding the usage still remain – and the image should be downloaded via encrypted HTTPS protocol, if the questionnaire is also transmitted in encrypted format. Otherwise, some internet browsers display a security warning.
Tip: If you want to display an image as a logo on each page in the questionnaire, do not upload it in the normal way. Instead, upload it in Footer and Logo in the tab Logo.
Prepare Images for the Internet
A few preparations are necessary to ensure an image can be displayed properly. Generally, the image has to be scaled to the right size and then saved in a file format suitable for the internet (e.g. GIF, PNG or JPG).
Image editing software is needed to process images for the internet. If you do not have this type of software to hand, download the open source software GIMP for free.
Scale Images
The size of the image displayed in the questionnaire depends on the size of the pixel. One pixel (typically) corresponds to one pixel on the screen. Set the magnification/zoom in your image editing software to 100% in order to see the original size of the image.
- There is no point specificing another size in centimeters (or the like) in the image.
- In principle, you can also specify the size of an image when embedding it with HTML code – however, using the browser to do the scaling tends to produce a worse quality (blurry). The questionnaire also loads for an unnecessarily large amount of time because the size of the file and, therefore, the transmission time, increases with the size of the pixel.
Scale the image as follows:
- Open the original image in the image editor.
- Convert the image to RGB mode (greyscale images to the greyscale mode), if it involves an indexed image (Color Depth).
- Scale the image with the image editor. Please ensure that the size is given in pixels (resolution or size specification in centimeters is irrelevant for online display).
- Tip: If your images are hard to read/recognize after resizing, you may change they questionnaire's width (Questionnaire Layout) to have more overall space.
- On small displays (e.g., on smartphones), the layout will shrink (Questionnaire for Smartphones). Use
<img src="..." style="max-width: 100%">to automatically resize an image as well.
- Use the feature Unsharp Mask (or Sharpen) if the image seems muddy after scaling.
- Reduce color depth if it involves a graphic. The fewer colors you need (units are counted in powers of 2, i.e. 255, 127, 63, 31, 15, 7, 3 or 2 colors), the smaller the file and thus the quicker the questionnaire will load. Leave the color depth unchanged for photos.
- Save photos in JPG format, and graphics in PNG or GIF format. For JPG files, the optimal compression depends on the image: lower the quality and keep an eye on the Preview. Pay particular attention to sharp edges. If the image does not look quite right, move the control to improve the quality.
Color Depth
Colour depth describes how many colors a single pixel can have in the image. The average screen can display around 16 million different colors (24-bit - 8-bit each and 256 shades of the primary colors red, green, and blue ). Only a fraction of these are needed for graphics (e.g. graphs, website screenshots, schematic diagrams): a black and white image (line drawing) only needs 2 colors, a greyscale images only needs 8-bit (265 shades of gray) or less. Even a colorful diagram can get by with few colors if needs be. On the other hand, photos usually require full color depth.
- Images with full color depth are often referred to as “RGB”.
- Images with 256 shades of gray are referred to as “greyscale images”.
- Images with 256 or fewer colors are referred to as “indexed images”.
The color depth depends greatly on the file format used:
- RGB images are usually saved in JPG format for the internet. Depending on the level of compression, this format discards data. This means that sometimes, especially when it comes to sharp edges, compression artifacts are created. JPG is also suited to greyscale images.
- Indexed images are saved in PNG or GIF format for the internet. In principle, PNG can also save RGB images, however, the files become very large because no data is discarded.
Images and Graphics Examples (each 100 × 100 pixels)
 |  |  |  |  |
| Photo (JPG) 85% Quality | Photo (JPG) 15% Quality | Reduced to 8 Colors (PNG) | Graphic (PNG) 8 Colors | Graphic (PNG) 8 Colors |
Upload Images
In the menu item Image and Media Files, you can upload an image into your project overview. Select the tab Upload images in order to do so.
- You can select one or several files to be uploaded with the button next to Image file(s).
- SoSci Survey wants to spare you the hassle of expensive cease-and-desist orders and ensure that you also have the necessary rights to use the image. Therefore, you have to check one of the four options regarding the source of the image before uploading the file.
- If you check the option Use protected filing, the image will not be uploaded directly into the project overview, and into a protected directory instead. Thus, the image can only be accessed by the respondent – it is not available on the internet with a search engine or a URL. Please bear in mind that the image name must have
pro://as a prefix. - When Upload image is clicked on, the graphic file is transferred to the server. This can take a little while, depending on the size of the file. Afterwards, the image can be used in the questionnaire.
Integrate an Image into the Questionnaire
The are several ways to integrate an image:
- Drag the image onto the questionnaire page as an element in the questionnaire. By doing this, an image can be displayed above or below a question (or, as the only element on the page).
- Use the image as a logo, so that it is shown on every page in the questionnaire. To do so, do not upload the image in the normal way: upload it in Footer and Logo → Logo instead.
- Embed the image in the layout with HTML code so that it is displayed on every page in the questionnaire. To do so, you can edit the layout used in Questionnaire Layout (or create a new one) and add the HTML code for the image in a suitable place in HTML Template of the Layout.
- Embed the image in a question (i.e. question, explanation or item text) with HTML code.
- Display the image in any position with HTML code, e.g. next to a question or two images side by side (Placing Elements Side by Side). It make sense to save the complex HTML code as a text element first of all and then insert this into the questionnaire.
Only the <img> HTML tag is needed to insert an image with HTML. The image address (source, “src”) must be given as the attribute. In addition to this, alternative text (alt) which is shown if the images cannot be displayed for whatever reason, should be specified. In order to make the questionnaire accessible, another description of the image content can be added by using title.
If an image has been uploaded in the project view, the address (src) is simply the file name of the image. The paragraph tag in the following example ensures that the image appears in its own section, and not in the middle of the text.
<p>Text above the image.</p>
<p><img src="image.gif" alt="Pink Elephant"></p>
<p>Text below the image.</p>
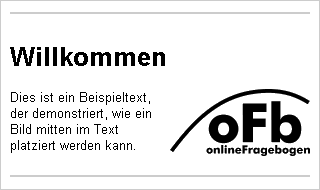
There are two CSS classes (class) defined in SoSci Survey, with which you can position an image so that the text runs around the outside: left and right. Thus, if an image should appear to the right of the text, the class right will be added to the <img> tag as the attribute:
<h1>Welcome</h1>
<p><img src="https://www.soscisurvey.de/homepage/sosci.logo.png" alt="SoSci Survey" class="right">
This example demonstrates how an image can be positioned to the right of the text.</p>
HTML permits a variety of options when inserting images – for more information please see SelfHTML: Graphics and SelfHTML: CSS Properties.
Images as Answers
Images can also be integrated directly into questions and items. The HTML tag <img> is used here once again.
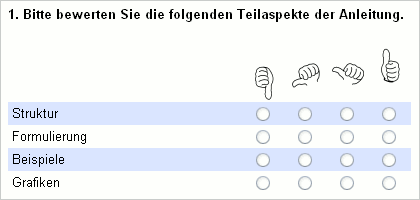
This means the verbal anchorage in a scale with intermediate values can be graphically designed, or be selected in a Horizonal selection between images.
Tip: You do not have to write the <img> tag yourself. Open Image and Media Files and click on the desired image. The HTML code appears immediately.
Note: The following examples use a specific notation as the image address: ofb://imagename. These means some default images available in SoSci Survey (e.g. a smiley scale and a thumb scale) can be integrated. If you upload the images yourself, use the file name of the image.
Note: Upper and lowercase are both valid on the internet. Image.gif is not the same as image.gif. If an image cannot be displayed, check the case and the ending first of all. Avoid blank spaces in file names.
Images as Selection Options


Images as Verbal Anchors

