- de
- en
This is an old revision of the document!
Table of Contents
An Online Questionnaire in 5 Minutes
This introduction explains the general functionality of SoSciSurvey on the basis of a small questionnaire.
The tutorial takes approximately 5 minutes and illustrates step by step how to create questions and how to arrange them in a questionnaire.
Preparation
Before getting started, you need a SoSciSurvey user account, for example on SoSciSurvey.de. If you have not set up a survey project yet, do it now (Create Survey Project).
Step by Step
Conducting an online questionnaire consists of different parts corresponding to the chapters of the instruction manual:
- Creating a catalogue of questions (creating questions, possibly texts, pictures etc.)
- Arranging questions into a questionnaire
- Starting the survey (testing the questionnaire and inviting participants)
- Downloading and analysing data (the latter with an external software)
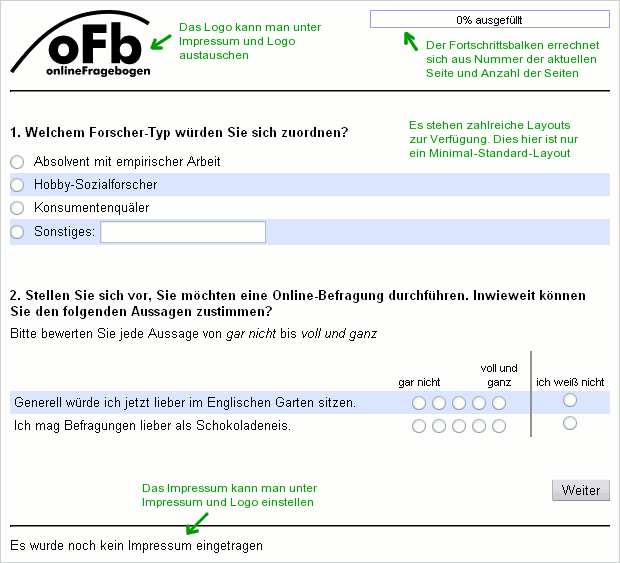
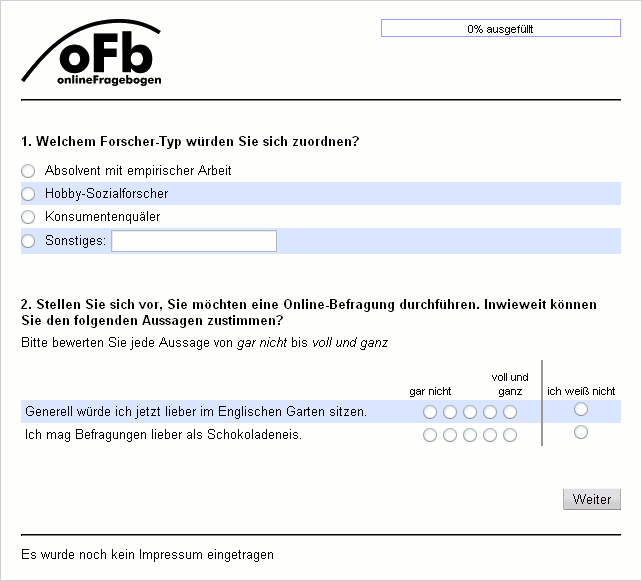
This tutorial introduces the first two parts step by step. The questionnaire below, including a selection and a little scale, will provide the example for the manual:
Part 1: Creating Questions
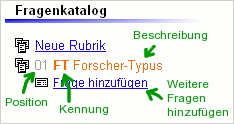
At the top left of the menu you can find the List of Questions. Here, questions are sorted into content-related Sections. These sections are independent of how and where the questions appear in the questionnaire. They simply help to sort questions with regards to content (e.g. sociodemographics, use of media, personality etc.). Please click on New section.
In the form on the right, for the ID enter “RT” and for the Name enter “Researcher Type”. Confirm this by clicking on Save  .
.
Note: The ID and the name are of course only examples - you can create your own sections within your project.
The new section RT Researcher Type is displayed below the List of Questions in the menu on the left. In front of the section the current rank is displayed (grey), followed by the ID and the name.
As you can see, the new section was automatically selected: The section is highlighted and you can create a new question in the right-hand window.
The term of a question should be chosen in a way that you remember what it is about (when composing the questionnaire and analysing the data). The title does not appear within the online questionnaire.
Note: Keep your terms short but “indicative”. Thus, you keep track of your questions both during the composition of the questionnaire and during the documentation/analysis.
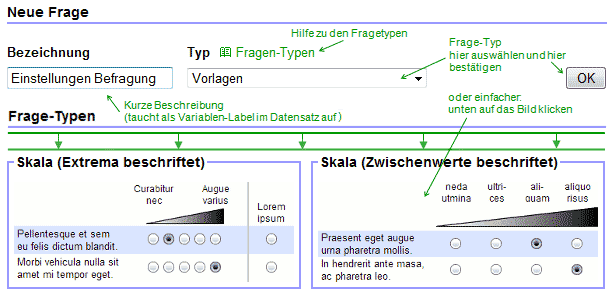
For the Term of the new question, please enter “Settings Questionnaire”.
You can select the question Type “Scale (fully labeled)” in the dropdown menu. It's probably easier though to click the corresponding image below.
Tip: First enter the term for the question then click on the image below. Thereby you do not need to click Save  .
.
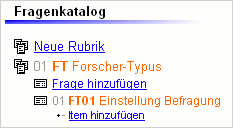
The question now appears in the List of Questions - the first number (grey) is the position of the question within the section and helps sorting. This is followed by the ID of the question (RT01) and the term. More about this later.
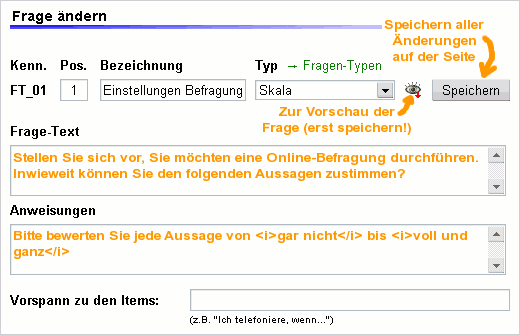
After creating the question, you get more options in the right-hand window. Please enter the following values:
- Question Title: “Imagine, you want to conduct an online survey. To what extent do you agree to the following statements?”
- Instruction: “Please rate each statement from <i>fully disagree</i> to <i>fully agree</i>.”
Tip: You have probably noticed the <i> in the instructions. This is a so-called HTML tag and indicates that the enclosed text shall be displayed in italics. In case you need such designs, have a look at the section Texts in a Questionnaire.
Tip: You can copy texts via copy and paste into the form – this is especially helpful if you have already created the questionnaire in a word processor (e.g. OpenOffice or Word). Copying works especially fast, if you put the word processor in the upper half of your screen and the browswer window in the lower half.
Below the instructions, you can find further settings for the questions. In the first tab Scale you can find the option Alternative Option. Please enter “Don't Know” at Alternative Option (-1).
In the tab Anchors, within Verbal anchors, enter “fully disagree” as a Minimum and “fully agree” as a Maximum.
By clicking Save (at the top of the page or below the settings) any changes made on this page are saved. A small green triangle pops up at the top right to confirm changes. The colour changes from green to grey after a while.
At the top, to the left of the save button, you can find a little Eye. By clicking on the eye you can jump to the Preview section at the bottom of the page. In the preview, you can now see the correct question title and the scale. However, the content of the scale is still missing.
Note: In SoSciSurvey, the subquestions in a question are denoted as Items and the options of a selection are denoted as Options. Items and options are technically identical - sometimes you may read “Item” instead of “Option”.
Quick Input for Items and Options
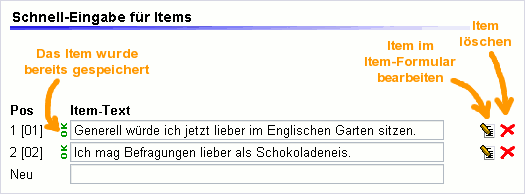
There are several options for creating items for a question. First, regarding the Quick input: Just above the Preview you can find the Quick input for options. In the empty boxes, please enter the following statements:
- Text: “Generally, I'd rather sit in a park now.”
- The grey OK indicates that the item has not been saved, yet. Do not bother to click on the little grey arrow on the right, just press the Enter or Return button. The item is now transferred to the server and appears shortly after in the Preview window. In the meanwhile you can type in a second item (or copy-paste it):
- Text: “I prefer surveys over chocolate ice cream.”
- The green OK on the left indicates that the item was saved. In contrast to the question options above the items/options in the Quick input are saved directly, you do not need to click on Save again.
You can see that the new items also appear on the left in the List of Questions. More about that later.
You have now completed all necessary settings for the first question.
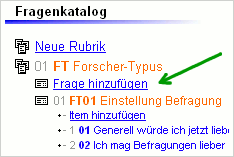
In order to create the next question, click on Add question.
Note: In case the section “RT” is not active anymore (e.g. because you worked on another part of the project), just click on the appropriate section within the List of Questions.
On the right, the form for a new question reappears. Please enter the following:
- Term: “Self-evaluation”
- Type: “Selection”
After clicking Save  , a question with the ID “RT02” appears in the List of Questions. On the right, the design options for the question show up. Enter the following:
- Question title: “Which researcher type would you assign yourself to?”
Click on Save.
Adding Items via the List of Questions
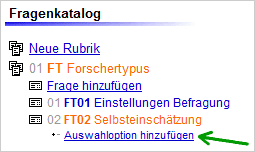
Another way to add items or options to a question is via the List of Questions. After selecting a question, the function Add Item or Add Option appears. Click on this function.
A form shows up on the right, which, depending on the question type, offers more settings than the Quick Input.
Tip: The form also shows up when clicking on the  symbol next to an item in the Quick Input frame.
The input field Text is already activated, so you can immediately start typing. Please enter the following option:
- Text: “Graduate with empirical work”
You can simply save the item by pressing the Enter or Return button and add the next option in the new form:
- Text: “Hobby Social Researcher”
- Text: “Tormentor of Consumers”
For the next item, set some additional options:
- Text: “Other:”
- Tick the box Show text input field for this option
Now, click Save  and then on RT02 Self-evaluation to return to the question.
In the preview, the four items are displayed. There is an input field for open responses behind the last item.
Now your project contains two questions. However, the order in which they appear in the questionnaire is not set, yet. The order of questions, their distribution over various pages and filter questions (questions that determine whether particular other questions are displayed) are specified in the questionnaire.
Part 2: Assembling Questions into a Questionnaire
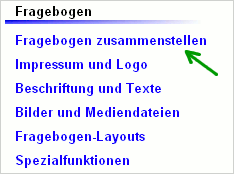
On the left, below the List of Questions, please click on Compose Questionnaire.
Select Create new questionnaire.
Questionnaire Pages
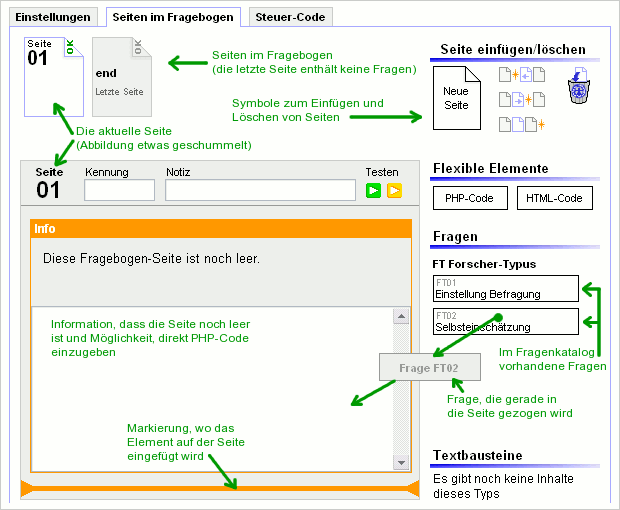
As a default, the program creates a questionnare with 2 pages: the first page corresponds to an empty questionnaire page. The second page is special: it only contains a Thank-You note at the end of the survey. You can neither add questions nor flexible elements (PHP or HTML code) to this page. While the first page of the questionnaire only contains a “Next” button, participants can neither navigate forward nor backward from the last page.
Note: When specifying to display a “Back” button in the questionnaire (in the tab Settings), it is not displayed on the last page. This is because an interview is completed once the last page is reached - there is no way back anymore.
To insert further pages, there are multiple symbols on the right.
On the left, below the Questionnaire Pages, you can see Page 01, which does not contain any questions, yet.
Placing Questions
On the right you can see, amongst other things, the Questions you created. Using the mouse, drag Question RT02 onto the empty page on the left.
The information about the empty page is replaced by the question.
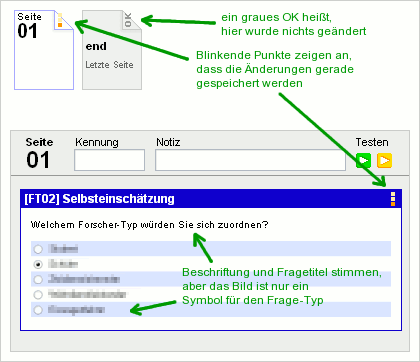
Important: The pictures are only symbolic illustrations of the question type.
Tip: On the right you will find a couple of helpful symbols: Using the Undo button  you can undo your recent changes, by using
  you can recover your undone changes (redo). Next to the Questions, you can find the Reload list button
  . This button reloads the list of questions, in case you are working on the survey in another browser tab or window and created a new question there.
Whenever you make changes, you can briefly see yellow/orange dots flashing. This means that data is being transferred to the server. Once the data is saved, a green OK is displayed. Therefore, you do not need to save the questionnaire once more.
Add Question RT01 on the first page as well - below the other question.
Once the questionnaire is (automatically) saved, you can check the result by clicking on the green arrow  (Testing). The questionnaire is run starting from the selected page in a new browser tab or window.
Tip: In the new browser tab or window, you are on the first page of the “real” questionnaire. If you click on “Next”, the Thank-You page is displayed - your questionnaire so far only has one page with questions. You can change the content of the Thank-You page when composing the questionnaire on the Last page.
Tip: As a default, an invitation to the SoSci Panel is displayed on the last page. This is a non-commercial panel to support scientific research (and thus many SoSciSurvey users). We would appreciate, if you display this inviation in your questionnaire.
Tip: At the bottom of the questionnaire, contact information is displayed. Adjust the footer by clicking on Footer and Logo on the left.
Tip: Use the yellow arrow  to start the questionnaire in debug mode. This helps when editing and searching for errors.
The presentation of the questions looks alright, but not ideal, yet. Have a look at the chapter Optimising the Presentation of Questions if you're interested. This chapter continues at exactly this point, but does not fit within the announced 5 minutes.
Publishing the Questionnaire
In Compose Questionnaire you can already run a preview of the questionnaire ( ). The public however cannot access the questionnaire, yet.
To “really” test the questionnaire, publish it: First, you should add contact information (Footer and Logo), then set the survey administration period at Survey Project → Project Settings (Set Survey Administration Period).
Important: Before actually publishing your survey, some more settings should be checked. Please refer to the chapter Preparing and Starting the Survey.
A Few Tips for Your Project
- Important: Before launching the questionnaire, there are a few more things to do. Have a look at the notes displayed when clicking on Project Overview and/or read the chapter Preparing and Launching the Survey.
- Reading the chapter Instructions for Common Jobs can save a lot of time – especially for users new to SoSciSurvey.
- Also have a look at the exhaustive chapter Designing the Questionnaire.
- If you run into problems, have a look at the FAQs (in German). They often have the answer you are looking for.
- You do not need to type in common questions regarding sociodemographics manually. When clicking on New section a couple of packages are readily available (currently only in German though).
- SoSciSurvey does not offer any statistical data analysis, specific software packages (such as SPSS or GNU R) are more suitable for this. Simple data can also be analysed using a spreadsheet software (such as OpenOffice.org Calc or Microsoft Excel). How to access the collected data is described in the chapter Collected Data and Documentation.
- At Questionnaire Layout, you can activate different layouts or create one yourself. As long as you haven't activated a layout, SoSci Survey uses a basic layout.
The manual's other chapters describe numerous options of designing a questionnaire. Take a look: Overview.


